Author: Staff

  • Silk & Wrap Nails 101: A Complete Beginner’s Learning Tutorial

    Silk & Wrap Nails 101: A Complete Beginner’s Learning Tutorial

    🔥 Trending now – share this post

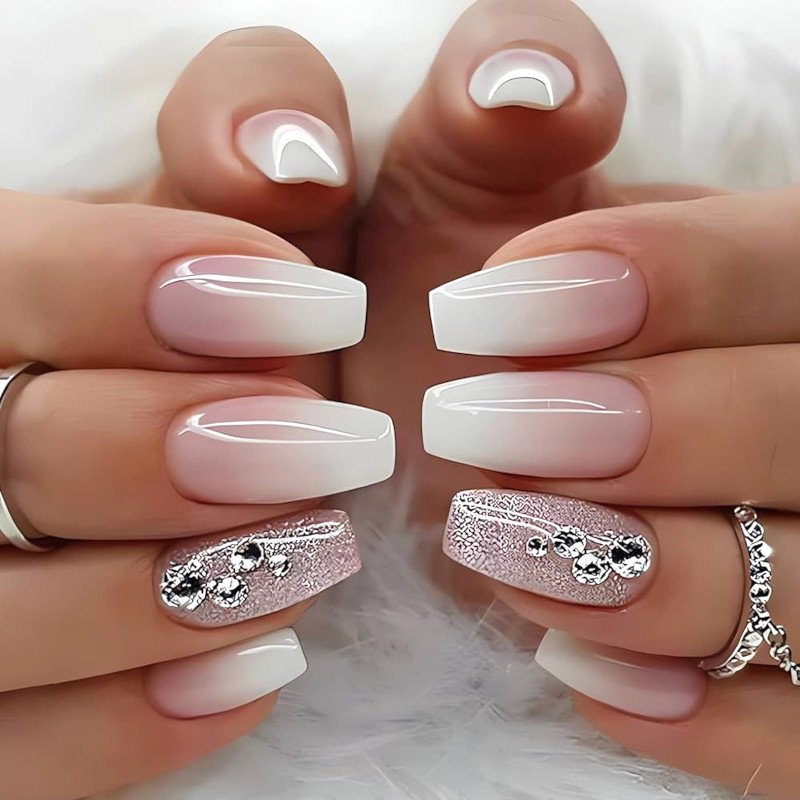
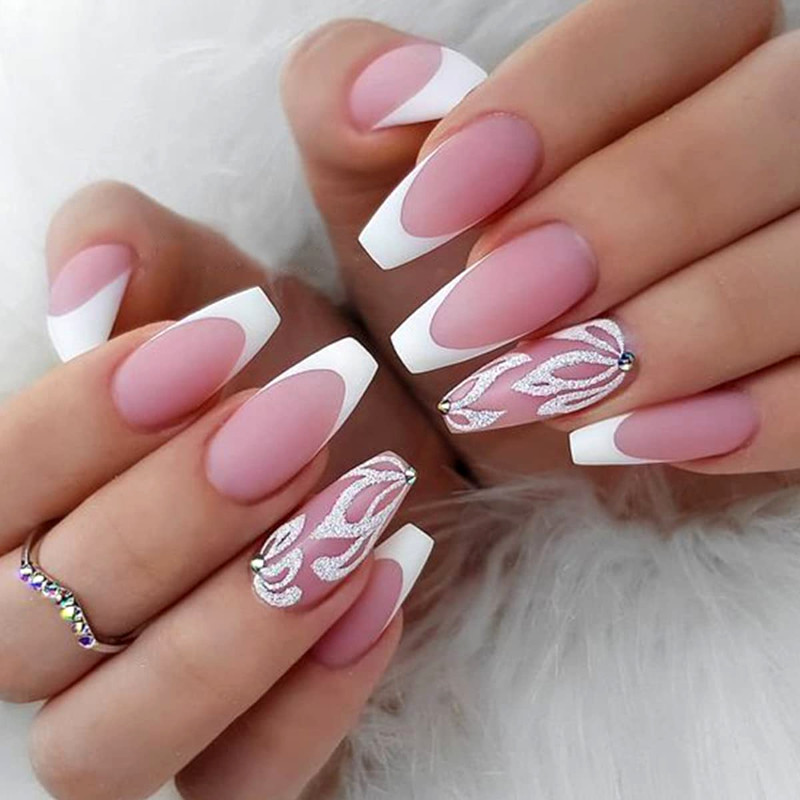
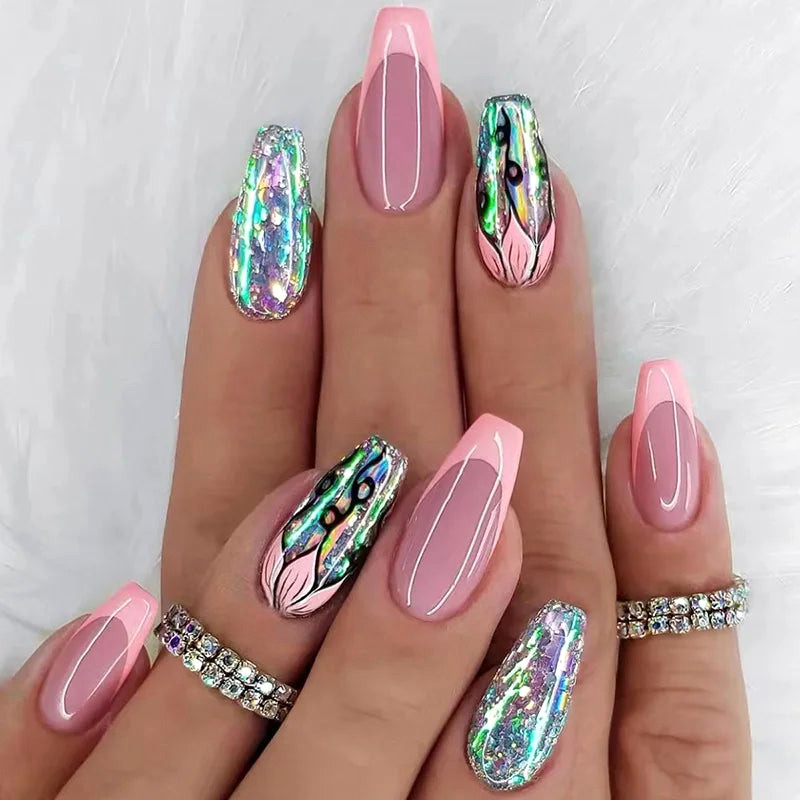
    Hey nail newbies and beauty buffs! If you’re dreaming of strong, elegant nails without the heaviness of acrylics or the commitment of gels, then wrap and silk nails might just be your new obsession.

    These gentle, natural-looking nail enhancements are perfect for adding strength, fixing breaks, or simply leveling up your manicure game.

    Whether you’re curious about trying something new or just want to get back to basics, this guide will walk you through everything: what silk and wrap nails are, how they work, how to apply and remove them, and how to keep them looking flawless.

    What Are Silk and Wrap Nails?

    Silk and wrap nails are types of nail enhancements that use thin fabric materials—like silk, fiberglass, or linen—to add strength or repair damaged nails. These wraps are cut to size, placed over your natural nails or tips, and secured with nail glue or resin. Once hardened, they create a smooth surface that can be shaped, painted, or left natural. Think of them like invisible armor for your nails—subtle but super effective.

    A Quick History of Nail Wraps

    Nail wraps have been around since the early 20th century, originally used by salons to reinforce or repair split nails. Back then, materials like silk or even paper were used with glue to create a sturdy patch. Over the years, this old-school fix evolved into a chic alternative to acrylics and gels—offering strength and style without the bulk.

    What Are Wrap Nails Made Of?

    There are a few different types of wrap materials, each with its own feel and finish:

    • Silk wraps: Soft, natural-looking, and great for a polished, clean appearance.
    • Fiberglass wraps: Slightly stronger and more durable than silk.
    • Linen wraps: Thicker and more textured, used when maximum strength is needed.

    These wraps are combined with glue or resin to adhere to the nail and harden into a protective layer. Once buffed and shaped, they blend in seamlessly.

    How to Apply Silk and Wrap Nails (Step-by-Step)

    The application process is a bit more delicate than press-ons but still totally doable with practice. Here’s how to apply silk and wrap nails:

    Step 1: Prep Your Natural Nails

    • Wash your hands and dry thoroughly.
    • Remove all nail polish.
    • Lightly buff the surface of your nails to remove shine.
    • Push back cuticles gently.
    • Clean your nails with rubbing alcohol or nail prep solution.

    Step 2: Cut and Shape the Wrap

    • Choose the wrap material (silk, fiberglass, or linen).
    • Cut small pieces to match the size and shape of your nails.
    • Round off any sharp edges so they blend better.

    Step 3: Apply the Wrap

    • Apply a thin layer of nail glue or resin to your natural nail.
    • Carefully place the wrap on top and press it down.
    • Smooth out any bubbles or wrinkles with tweezers or a cuticle stick.

    Step 4: Seal and Set

    • Add another layer of glue or resin over the top of the wrap.
    • Let it dry completely (you can use an activator spray to speed it up).

    Step 5: Shape and Buff

    • Once hardened, gently file and shape the nail.
    • Buff the surface until it’s smooth and even.

    Step 6: Finish

    • Apply nail polish, gel top coat, or leave them bare with a clear coat for a natural look.

    How to Maintain Silk and Wrap Nails

    Silk and wrap nails are durable, however you should maintain them carefully. Here’s how to keep them fresh:

    • Avoid using your nails as tools, wear gloves or protect your fingertips.
    • Keep them dry when possible—moisture weakens glue.
    • Reapply top coat every few days to maintain shine.
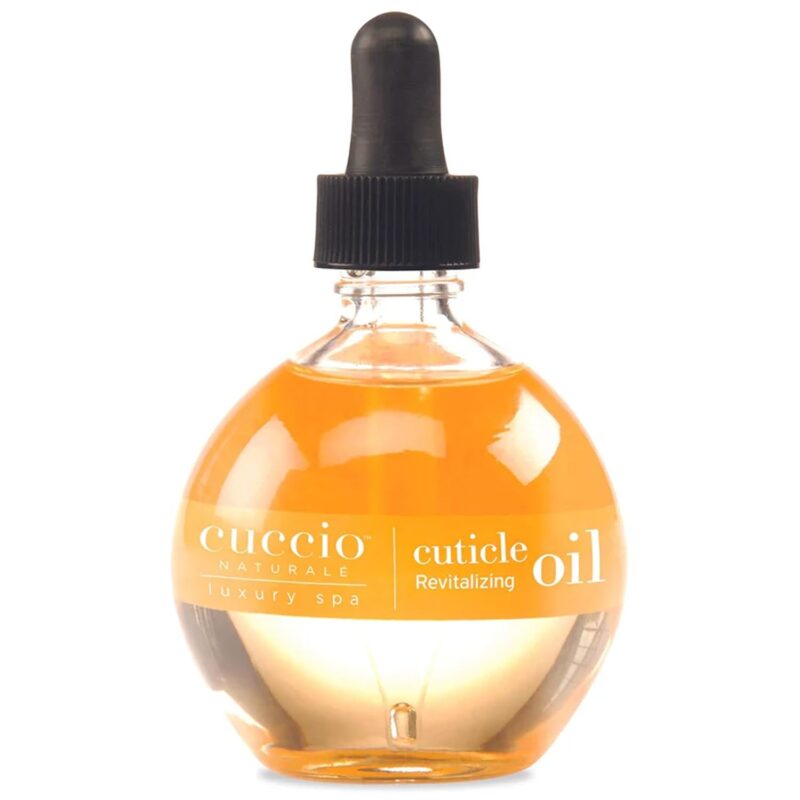
    • Use cuticle oil to nourish your nail beds and keep things healthy.
    • If a wrap starts lifting, gently glue it down again to avoid water getting underneath.

    Wrap nails can last 1–2 weeks with proper maintenance, depending on how actively you wash your hands or do activities.

    How to Remove Wrap or Silk Nails Safely

    Taking your wraps off the right way will keep your natural nails happy and healthy.

    Step 1: Soften the Glue

    • Soak a cotton ball in acetone.
    • Place it on your nail and wrap it in foil.
    • Let it sit for 10–15 minutes to loosen the glue.

    Step 2: Gently Remove

    • Use a cuticle stick to lift the wrap.
    • Don’t pull or force—resist the urge!
    • Re-soak if it doesn’t come off easily.

    Step 3: Clean and Hydrate

    • Buff away any remaining glue residue.
    • Wash your hands and apply cuticle oil or moisturizer.

    Are Wrap and Silk Nails Safe?

    Yes, and they’re often recommended for those with sensitive nails. Since there’s no harsh filing or strong chemicals involved, wrap nails are considered one of the gentler options. Plus, they’re breathable and lightweight.

    Just keep in mind:

    • Let your nails rest a short period of time between applications.
    • Avoid applying wraps to severely damaged or infected nails. This will worsen your nails.

    Wrap and Silk Nails vs. Other Nail Types

    Not sure if wraps are your vibe? Here’s how they stack up against other popular nail types:

    • Acrylics: Strong and long-lasting, but heavier and more damaging over time.
    • Gel Nails: Glossy and flexible, but require UV light and a more involved removal process.
    • Dip Powder: Durable and vibrant, but not always ideal for nail repairs.
    • Press-Ons: Fast and trendy, but less durable for everyday wear.

    Wraps are ideal if you want a natural look with added strength, especially if you’re repairing broken nails or growing them out.

    Why Choose Wrap and Silk Nails?

    If you love a minimalist vibe or want nails that don’t scream “fake,” wraps are a winner. They keep your nails healthier and protected.

    • Super natural-looking.
    • Lightweight and comfortable.
    • Great for strengthening thin or cracked nails.
    • Easy to paint or leave bare.
    • Perfect for DIYers who like a low-maintenance routine.

    Final Thoughts

    Silk and wrap nails aren’t as flashy as acrylics or as trendy as gels, but they’re reliable, elegant, and super beginner-friendly.

    Whether you’re fixing a nail emergency, need an alternative nail type, or desire subtle strength and shine, they’re an amazing addition to your nail repertoire.

  • Press-On Nails 101: A Complete Beginner’s Learning Tutorial

    Press-On Nails 101: A Complete Beginner’s Learning Tutorial

    🔥 Trending now – share this post

    Hey beauty lovers! If you’re craving gorgeous nails fast—no polish, no UV lamp, no waiting—press-on nails might just be your new beauty BFF. These little lifesavers have come a long way since their drugstore-only days.

    Today’s press-ons are chic, customizable, and can totally fool people into thinking you hit up a salon. Whether you’ve never worn fake nails before or you’re ready to master the press-on game, this guide will walk you through everything: what they are, how they work, how to apply and remove them, and how to keep them looking fierce.

    What Are Press-On Nails?

    Let’s start with the basics. Press-on nails are artificial nails that come pre-shaped and often pre-polished. They’re designed to be applied directly over your natural nails using either glue or adhesive tabs. No need for special tools or lights. Just press and go! They’re a quick, easy, and affordable way to change your nail look without a long-term commitment.

    A Brief History of Press-On Nails

    Press-on nails have been around since the ’70s and ’80s, when they were mainly used as quick-fix beauty products. Back then, the styles were limited and kind of, well… fake-looking. But fast forward to today, and the glow-up is real. With better materials, trendier designs, and more reliable adhesives, press-ons have officially entered the cool-girl beauty chat.

    What Are Press-On Nails Made Of?

    Most press-ons are made from plastic or resin, but don’t let that scare you off. High-quality brands use durable, lightweight materials that mimic the look and feel of real nails. Some even have a flexible fit to hug your nail beds better. The finishes vary too—glossy, matte, French tips, 3D designs—you name it!

    There are two main types of press-ons:

    • Glue-on nails: Longer-lasting and more secure, ideal if you want your nails to last over a week.
    • Adhesive tab nails: Super beginner-friendly, perfect for short-term wear or event looks.

    How to Apply Press-On Nails (Step-by-Step)

    Application is key to getting that flawless, salon-level finish. It only takes a few minutes, but doing each step right makes all the difference.

    Step 1: Prep Your Natural Nails

    This step ensures your nails stay put and look natural.

    • Wash your hands and dry thoroughly.
    • Remove any nail polish.
    • Push back cuticles gently.
    • Lightly buff your nail surface with a nail file.
    • Wipe each nail with rubbing alcohol or nail prep wipes.

    Step 2: Choose the Right Sizes

    Each pack comes with multiple sizes—find the one that fits each nail best.

    • Match each press-on to your natural nail.
    • If it’s between sizes, go smaller—not bigger—for a better seal.

    Step 3: Apply Adhesive

    Pick your method:

    • Glue: Apply a small dot to both your natural nail and the back of the press-on. Don’t overdo it or it’ll ooze.
    • Adhesive tabs: Peel and stick them directly to your natural nails.

    Step 4: Press and Hold

    Align the nail starting at the cuticle and press down firmly.

    • Hold for 10–30 seconds to lock it in place.
    • Avoid water or pressure for at least an hour after applying.

    How to Wear and Maintain Press-On Nails

    You’ve got the look—now here’s how to make it last. Even press-ons need a little love to stay fresh and flawless.

    • Avoid soaking your hands for long periods.
    • Use gloves while doing dishes or cleaning.
    • Apply cuticle oil to keep your natural nails healthy underneath.
    • Re-glue any nails that start to lift—don’t wait for them to pop off.
    • Don’t use your nails as tools (no prying, poking, or peeling).

    Depending on the adhesive and how well you care for them, press-ons can last anywhere from a few days to up to 10 days.

    How to Remove Press-On Nails Safely

    No tugging, no ripping. Let’s protect your natural nails with these gentle removal steps.

    Step 1: Soak (If Using Glue)

    • Soak your nails in warm, soapy water or a bowl of oil (like olive oil) for 10–15 minutes.
    • This softens the glue and loosens the nails.

    Step 2: Gently Lift

    • Use a cuticle stick to gently wiggle under the press-on and lift from the sides.
    • Never force it—re-soak if it’s stubborn.

    Step 3: Clean Up

    • Remove any leftover glue with a soft buffer.
    • Wash hands and moisturize your nails and cuticles.

    If you used adhesive tabs, just peel the nails off gently and clean your natural nail.

    Are Press-On Nails Safe?

    Totally—when used correctly. Press-ons are one of the least damaging fake nail options because they don’t require harsh chemicals or filing down your natural nail beds. They’re also a great alternative if you want glam nails without committing to gel or acrylics.

    Safety tips:

    • Don’t leave them on for more than 10 days straight.
    • Always clean and prep your nails before applying.
    • Give your nails a break between sets if possible.

    Press-On Nails vs. Other Nail Types

    Still debating your perfect mani match? Here’s how press-ons compare to the rest:

    • Gel Nails: Long-lasting, super shiny, but require UV light and a longer removal process.
    • Acrylic Nails: Great for length and structure, but take time and skill to apply.
    • Dip Powder: Durable and colorful, but not as easy to remove.

    Press-ons are perfect for anyone who wants cute nails in minutes—with way less hassle.

    Why Choose Press-On Nails?

    Press-on nails have made a major comeback, and for good reason:

    • They’re fast and easy to apply.
    • You can switch up your look as often as you like.
    • No salon appointment required.
    • No long-term damage to your natural nails.
    • Tons of trendy designs available online and in stores.

    Whether you’re switching styles every weekend or just need a quick fix before brunch, press-ons are your low-commitment glam go-to.

    Final Thoughts

    Press-on nails are the ultimate beauty hack—chic, convenient, and customizable to your mood. With just a little prep and care, you can rock a flawless set that looks like it came straight from a salon. And the best part? You’re totally in control of your look, your schedule, and your vibe.

    So go ahead, snap on those stunners, show off your style, and feel fabulous—because your nails should be as flexible and fun as you are!

  • Gel Nails 101: A Complete Beginner’s Learning Tutorial

    Gel Nails 101: A Complete Beginner’s Learning Tutorial

    🔥 Trending now – share this post

    Hey beauty lovers! If you’ve ever admired those super glossy, chip-resistant nails and wondered how to get that salon-perfect look at home, gel nails might just be your new go-to.

    Whether you’re a total newbie or looking to brush up on the basics, this guide breaks it all down: what gel nails are, their history, how to apply them like a pro, keep them looking fab, and remove them the right way.

    Let’s get you glowing!

    What Are Gel Nails?

    Before we get into the how-to, let’s talk about what gel nails actually are. These aren’t just your average polish. Gel nails are created using a gel-based formula that requires curing under a UV or LED lamp. Once cured, each layer locks in place, creating a super durable and ultra-shiny finish. They can be applied to natural nails or used with extensions for added length and style versatility.

    A Brief History of Gel Nails

    Believe it or not, gel nails have been around for a few decades. They first made waves in the 1980s but didn’t gain massive popularity until the early 2000s, thanks to improved formulas and easier application methods. Back then, they were mostly used to add strength to natural nails. Now? They’re a full-blown trend, with thousands of colors and endless design possibilities.

    What Are Gel Nails Made Of?

    Understanding what goes into gel polish helps you use it more effectively. Gel polish contains ingredients that react under UV or LED light, allowing it to harden and stick to your nail. Unlike regular polish, which air dries, gel polish stays wet until it’s cured, giving you time to perfect each layer.

    Types of gel products:

    • Base coat: Grips the polish and protects the nail.
    • Gel color polish: The pigment layer, applied like regular polish.
    • Top coat: Locks in shine and seals the whole thing.

    How to Apply Gel Nails (Step-by-Step)

    Applying gel nails might sound intimidating, but once you get the hang of it, it’s actually super straightforward. Here’s a full walkthrough so you can confidently apply your own gel manicure from home like a total pro.

    Step 1: Prep Your Natural Nails

    This is the foundation of any good manicure. Clean, shaped nails make all the difference.

    • Wash and dry your hands.
    • Remove old polish.
    • Push back cuticles gently.
    • Trim and shape your nails.
    • Buff the surface lightly to remove shine.
    • Clean nails with rubbing alcohol or a nail cleanser.

    Step 2: Apply Base Coat

    A good base coat helps your polish stick better and prevents staining.

    • Apply a thin, even layer of gel base coat.
    • Avoid flooding the cuticles.
    • Cure under a UV/LED lamp for 30–60 seconds (check your polish instructions).

    Step 3: Apply Gel Color

    This is where your personality shines through. Pick a color that matches your vibe!

    • Apply a thin coat of gel color polish.
    • Cure under the lamp.
    • Repeat for a second (or third) coat for full opacity.

    Step 4: Apply Top Coat

    This step locks everything in and adds that signature gel shine.

    • Add your gel top coat.
    • Cure again.
    • Wipe off any sticky residue with alcohol if your top coat isn’t no-wipe.

    And that’s it — shiny, strong, and ready for selfies.

    How to Wear and Maintain Gel Nails

    You put in the work, now it’s time to keep those nails looking fresh. With just a bit of care, gel nails can stay flawless for weeks.

    Your gel mani can last up to 2–3 weeks if you care for it right:

    • Apply cuticle oil daily to keep everything hydrated.
    • Wear gloves when cleaning or doing dishes.
    • Avoid peeling or picking at the polish (resist the urge!).
    • Touch up any chips right away to prevent lifting.

    How to Remove Gel Nails Safely

    Taking off gel polish the right way is crucial. Doing it incorrectly can lead to nail damage, but don’t worry — we’ve got the foolproof method right here.

    Step 1: File the Top Layer

    • Start by breaking the seal on the top coat so acetone can do its job.
    • Gently buff the top coat to break the seal and allow acetone to penetrate.

    Step 2: Soak in Acetone

    • Soak a cotton ball in 100% acetone and place it on each nail.
    • This loosens the gel layers for easy removal.

    Step 3: Wrap in Foil

    • Keep the acetone-soaked cotton in place while it works its magic.
    • Wrap nails in foil and chill for 10–20 minutes.

    Step 4: Remove Softened Gel

    • Now the gel should be soft enough to come right off.
    • Use a cuticle pusher or orangewood stick to slide off the gel.
    • Buff off any leftover residue.

    Step 5: Moisturize

    • Wash hands.
    • Apply cuticle oil and hand cream.
    • Hydration is key after any removal process.

    Are Gel Nails Safe?

    Gel nails are safe when used properly, but there are a few things to keep in mind. It’s all about good habits and taking care of your natural nails.

    Here are a few tips:

    • Don’t over-buff your natural nails before application.
    • Use acetone sparingly and moisturize afterward.
    • Take breaks between sets to let your nails recover.
    • Always follow the product instructions.

    Gel Nails vs. Other Nail Types

    Not sure if gel is the right choice for you? Here’s how it stacks up against other popular nail options. Each has its pros and cons, but gel nails hit a nice balance for many people.

    • Acrylics: Stronger, longer, better for extensions but more rigid.
    • Dip Powder: Powdered polish system, great for durability and pigment.
    • Press-Ons: Quick and easy for temporary glam.

    Gel nails are a sweet spot: flexible, long-lasting, and perfect for a polished, everyday look.

    Why Choose Gel Nails?

    Gel nails are perfect if you want salon-quality nails without the high maintenance. They look amazing and stay fresh with minimal effort.

    If you want:

    • A high-gloss, chip-resistant finish
    • Minimal damage to natural nails
    • A quicker salon (or at-home) process
    • Custom colors and art that last

    Gel nails are totally worth it.

    Final Thoughts

    Gel nails are a fab way to boost your confidence, express your personal style, and keep your hands looking flawless. Whether you go DIY or book a pro appointment, knowing the basics helps you get the most out of your mani.

    So go ahead—pick your favorite color, get that top coat shining, and rock your next set with pride. Nail care is self-care, and gel nails make it easy to look polished no matter what your week throws at you.

  • Acrylic Nails 101: A Complete Beginner’s Learning Tutorial

    Acrylic Nails 101: A Complete Beginner’s Learning Tutorial

    🔥 Trending now – share this post

    Ever looked at a stunning set of nails and thought, “Okay, how do I get those?”

    Whether you’re totally new to the world of acrylics or just want to understand what all the buzz is about, this guide’s got you covered.

    We’re diving into everything — the history, the materials, how to apply them step by step, care tips, removal (without destroying your nails), and why acrylics might just be your new obsession.

    Grab a snack, a comfy seat, and let’s get into it!

    What Are Acrylic Nails?

    Acrylic nails are basically little works of art built on your fingertips. They’re made by mixing a liquid (monomer) with a powder (polymer) to create a thick, moldable paste. This paste hardens when exposed to air and turns into a strong, solid extension for your natural nails.

    You can use acrylics to add length, strength, and a seriously polished look. Want square tips? Stiletto nails? Something super glam or soft and subtle? Acrylics can do it all.

    A Brief History of Acrylic Nails

    Nail enhancements have been around for ages — we’re talking ancient China and Egypt, where royalty would use materials like bone, ivory, or even gold to flex their status. Fast forward to the 1950s, and a dentist (yes, really) broke a nail and whipped up a fix using dental acrylic. That little DIY hack eventually led to the acrylic systems we know and love today. By the ’70s and ’80s, acrylics had hit the beauty mainstream — and they haven’t looked back since.

    What Are Acrylic Nails Made Of?

    Here’s your beginner chemistry moment:

    Monomer: The liquid part. It smells strong, so open a window or work in a well-ventilated area.

    Polymer: The powder part. It reacts with the monomer to form that shapeable magic paste.
    Once combined, you get a little bead that you can shape right on your nail before it hardens. After it’s set, you file, buff, and polish it up — and boom, you’ve got fresh acrylics.

    How to Apply Acrylic Nails (Step-by-Step)

    This is the part where you become a DIY nail artist. Let’s break it all the way down:

    Step 1: Prep Your Natural Nails

    • Wash your hands (clean nails = happy nails).
    • Take off any old polish.
    • Gently push back cuticles — don’t cut them.
    • Trim and file your natural nails.
    • Lightly buff the surface to remove shine.
    • Wipe with alcohol or nail cleanser to remove oil and dust.

    Step 2: Apply Nail Tips (Optional but cute)

    • Choose tips that match your nail width.
    • Apply glue to the tip and press it on firmly.
    • Hold for about 10 seconds until secure.
    • Clip and shape the tip to your desired length and style.

    Step 3: Mix the Acrylic

    • Pour some monomer into a small dish.
    • Dip your brush in the monomer, then into the powder to form a small bead.
    • It should be smooth and not too runny or dry

    Step 4: Apply the Acrylic

    • Step 4: Apply the Acrylic
    • Place the bead near your cuticle (but don’t touch the skin).
    • Gently press and spread it down toward the tip.
    • Apply in small sections: start near the cuticle, then middle, then tip.
    • Repeat for each nail, taking your time to smooth and shape.

    Step 5: Shape and Smooth

    • Let them dry fully — they should feel firm and clicky.
    • File the sides and tips to get your shape just right.
    • Buff the tops until everything feels smooth and even.
    • Step 6: Polish and Finish
    • Dust off any debris.
    • Add your base coat, polish color, and top coat.
    • If using gel polish, cure under a UV/LED lamp.

    How to Wear and Maintain Acrylic Nails

    You’ve got your set — now let’s keep them looking fresh:

    Cuticle oil is your BFF: Use it daily to keep nails and skin moisturized.

    Treat them like jewelry, not tools: Don’t open soda cans or scrape off stickers with your nails.

    Get regular fills: Every 2–3 weeks as your natural nails grow.

    Gloves, always: Protect them when cleaning or doing dishes.

    How to Remove Acrylic Nails Safely

    No yanking allowed — let’s do it the gentle way:

    Step 1: File Off the Topcoat

    • Use a coarse nail file to remove the shiny polish layer.

    Step 2: Soak in Acetone

    • Soak cotton balls in 100% acetone.
    • Place one on each nail.

    Step 3: Wrap in Foil

    • Wrap each finger in foil to hold the cotton in place.
    • Chill for 20–30 minutes (perfect time for a podcast).

    Step 4: Gently Remove Acrylic

    • Use a cuticle pusher to scrape off softened acrylic.
    • If it’s stubborn, rewrap and soak again.

    Step 5: Moisturize Everything

    • Buff away leftover bits.
    • Slather on cuticle oil and hand cream.

    Are Acrylic Nails Safe?

    Totally — as long as you follow good practices:

    • Always work in a well-ventilated space.
    • Make sure your products are MMA-free (that stuff is old-school and damaging).
    • Watch for lifting or water getting trapped — it can lead to bacteria.
    • Give your nails a break now and then to breathe and strengthen.

    Acrylic Nails vs. Other Nail Types

    Here’s the lowdown:

    • Gel Nails: Flexible, natural-looking shine, but not as tough as acrylics.
    • Dip Powder: Great for quick strength and color, but not as customizable in shape.
    • Press-Ons: Quick and easy, but short-term and more fragile.
    • If you’re into long-lasting, sculptable, and fully personalized looks, acrylics are where it’s at.

    Why Choose Acrylic Nails?

    Still on the fence? Acrylics are perfect if you want:

    • Strength for days: These babies don’t break easily.
    • Custom vibes: Pick your length, shape, color — all of it.
    • Style options galore: Nude, neon, chrome, matte — yes to everything.
    • Nail rehab: They can protect fragile nails and stop you from biting.

    Final Thoughts

    Acrylic nails are more than just a beauty trend — they’re a form of self-expression and a way to treat yourself. Whether you’re going full DIY or heading to the salon, knowing the basics gives you more confidence and better results.

    Be patient, practice, and have fun with it. Your nails, your rules.
    Here’s to flawless sets, fresh designs, and nails that make you feel unstoppable!

  • I’m Stunned! Here’s How I Pay 90% Less Than Salon Prices For Insane Nails on a Budget: Top Ranked Review

    I’m Stunned! Here’s How I Pay 90% Less Than Salon Prices For Insane Nails on a Budget: Top Ranked Review

    🔥 Trending now – share this post

    Here’s the tea, you can get salon quality nail designs at a fraction of the price and its so easy to do! If you’ve ever thought, “there’s no way I could ever do that myself” — surprise: yes, you can. This trend is picking up since it is so versatile and you can create whatever nail designs you want!

    Born Pretty Nail Stamping Plates
    Born Pretty Nail Stamping Plates

    So how do you do it? Let me introduce you to the game-changing trend that is nail stamping.

    Wait… What Even Is Nail Stamping?

    Think of nail stamping like tiny temporary tattoos for your nails, but way cuter and way more customizable.

    How does nail stamping work? You use a set of plates with cool designs etched into them, and these are the stamping plates. You add a special polish over the nail design you want, press an applicator to the design to pick it up, and then press the design onto your nail. Super easy and quick!

    Born Pretty Nail Stamping Plates
    Born Pretty Nail Stamping Plates

    The result? It literally looks like you just walked out of a salon, except you did your nails in your pajamas while watching Netflix. We’re talking crisp lines, trendy patterns, and no costly salon appointment fees.

    Why Not Just Go to the Salon?

    Let’s be real — salon nails are fab, but the price? Not so much. A detailed nail art set can run you anywhere from $50–$100 a pop (especially if you’re getting hand-painted designs). That adds up fast if you’re into changing your nails with the seasons (or your mood, no judgment).

    Born Pretty Nail Stamping Plates
    Born Pretty Nail Stamping Plates

    With nail stamping, you’re making a one-time investment for a reusable set that lets you switch up your look whenever you want — for less than the cost of a single salon visit. Bonus: no tipping required, and you control the experience every time.

    So What’s the Deal with This Set?

    Let me put you on to the Born Pretty Nail Stamping Plate Set — your new go-to if you want salon-quality nails without the salon price tag.

    It comes with 8 metal plates featuring a whole bunch of designs: florals, lace, plaid, leaves, snowflakes, and more. Basically, you’ve got a design for every season, vibe, or outfit.

    Each plate is about the size of your palm and packed with detail. The etching is deep enough to pick up polish cleanly, which means your designs transfer super clearly. No smudging, no blotchiness, no regrets.

    Why It’s a Vibe ✨

    • Designs for Days: You can go soft girl aesthetic, moody fall vibes, or festive holiday glam without switching kits.
    • Major Savings: One kit = endless looks. No need to keep booking $80 nail appointments every time you want a fresh set.
    • Beginner Friendly: You don’t need to be a pro. If you can stamp a rubber stamp, you can do this.
    • Great Gift Alert: For your artsy friends or anyone who’s been wanting to try nail art — this hits the spot.

    How to Use It (Don’t Stress, It’s Easy)

    Here’s the glow-up routine:

    1. Do your nails like usual — base coat + color.
    2. Choose a design on one of the plates.
    3. Swipe a bit of stamping polish over the design.
    4. Use the scraper (usually included) to take off the excess polish.
    5. Roll your stamper over the plate — it picks up the design.
    6. Gently roll the stamper over your nail like a tiny paint roller.
    7. Seal it with top coat and boom: you’re a nail artist now.

    Hot tip: Clean your plate with nail polish remover between designs to keep things sharp.

    Why It Beats the Competition 💅

    Not all stamping plates are created equal, and if you’ve ever bought a cheap one, you know the struggle — poor engraving, blurry transfers, or just meh designs.

    Born Pretty wins on everything:

    • Has deep, clean etching for better polish pickup.
    • Features trendy, wearable patterns (not just random abstract blobs).
    • Delivers high-end quality for under $15.
    • Gets glowing reviews — people are especially obsessed with the snowflake plate for winter looks.

    Final Thoughts (TL;DR)

    Nail stamping is the ultimate beauty cheat code — you get custom, pro-level designs without the salon prices, wait times, or awkward small talk. The Born Pretty set makes it super easy, even if you’re totally new to the game.

    So if you’re ready to ditch the plain nails and give your hands some main character energy, grab this set. Your nails (and your wallet) will thank you.

  • Shocked! I DIY My Perfect French Tips in Seconds and Now Save Hundreds, So Easy : Top Ranked Review

    Shocked! I DIY My Perfect French Tips in Seconds and Now Save Hundreds, So Easy : Top Ranked Review

    🔥 Trending now – share this post

    Let’s be real: French tips are classic. Chic. Forever in style. But doing them yourself? Ugh. That’s a whole different story. Unless you have hands as steady as a surgeon and nerves of steel, those even, crisp white arcs are borderline impossible.

    Enter: the Saviland French Tip Nail Stamper. This lil’ jelly stamper is the cheat code for flawless French tips—and once you try it, you’re never going back to freehand life again. Stop waisting extra money at the salon, this French tip nail stamper pays for itself with one nail!

    What It Is: The Secret Weapon for Salon-Perfect Tips

    This amazing nail stamper is made of soft, bouncy silicone and is designed specifically for creating those iconic French curves in just one quick press. Literally, just dip, roll, and flex on everyone with your perfect mani.

    Saviland French Tip Nail Stamper
    Saviland French Tip Nail Stamper

    No shaky lines. No tape. No guides. No headaches.

    Why It’s a Must Have

    The Saviland French Tip Nail Stamper is a whole vibe. Stop spending tons of money on salon french tips when you can do them better. Get flawless french tips in seconds over any acrylic or gel nail or nail polish.

    Saviland French Tip Nail Stamper
    Saviland French Tip Nail Stamper

    🧼 Mess-free & beginner-friendly—anyone can use this (yes, even with your non-dominant hand!)

    💅 Perfectly curved tips every single time

    ✨ Jelly texture grips polish and transfers it like a dream

    🎨 Works with gel polish, regular polish, and even stamping polish

    🧽 Easy to clean—just dab some tape or sticky roller and it’s good to go

    💖 Great for French tips, half-moons, reverse French, color blocking, and more

    And yes, you can totally get creative—flip it, swirl it, sponge it, stamp it. Once you start playing with it, you’ll find new ways to use it every time.

    How to Use It (Without Overthinking It)

    Literally stop thinking and start doing with this tool. This is the easiest french tip nail stamper to use.

    Saviland French Tip Nail Stamper
    Saviland French Tip Nail Stamper
    1. Paint your base color like usual.
    2. Apply your tip color to the stamp head.
    3. Gently press your nail into the stamp or roll the stamp across your nail (depending on the look).
    4. Boom. Perfect French tip. 💅
    5. Seal it with top coat, post it on IG, and wait for the compliments to roll in. ✨

    Honestly, it’s giving main character energy in your nail game.

    Saviland vs. The Other Guys: Here’s Why It Wins

    There are other French tip stampers out there, sure—but they’re often too stiff, too tiny, or just plain messy. This one stands out because:

    Saviland French Tip Nail Stamper
    Saviland French Tip Nail Stamper
    • The jelly head is large and flexible enough to fit different nail lengths and curves
    • It works for natural nails and extensions
    • It’s soft enough to press into, but firm enough to keep polish crisp
    • Saviland actually gets the nail game—this isn’t their first viral product

    Basically, it works with you, not against you. And we love that for us.

    Final Take: This French Tip Stamper is Your DIY Nail Glow-Up

    If you love the look of French tips but hate the stress of painting them, this tool is 100% worth it. It’s quick, affordable, and low-key addicting. Your nails will legit look pro in seconds, and no one will believe you did them on your couch while watching your show.

    The Saviland French Tip Nail Stamper is one of those rare finds that actually makes your life easier and your nails cuter. It’s a win-win. Add it to your cart, buy now and thank me later. 💅✨

  • Must See! This Insane Nail Polish Remover Pen Saved Me On So Many Date Nights and Trips: Top Ranked Review

    Must See! This Insane Nail Polish Remover Pen Saved Me On So Many Date Nights and Trips: Top Ranked Review

    🔥 Trending now – share this post

    Okay real talk—nothing ruins a fresh mani like that one rogue swipe of polish that ends up halfway down your cuticle. You know the one. You try to wipe it with your finger, then a Q-tip, then you somehow make it worse? Been there.

    Enter: the OPI Nail Polish Remover + Corrector Pen. It’s tiny. It’s genius. And it’s about to become your favorite new nail sidekick.

    What It Is: Basically a Magic Eraser for Nail Polish ✨

    This pen is exactly what it sounds like—a salon quality precision polish corrector that lets you clean up those little mess-ups without having to redo your entire nail. It’s pre-loaded with OPI’s high-quality polish remover, and it comes with extra replacement tips so you’re not tossing it after a few uses.

    OPI Nail Polish Corrector
    OPI Nail Polish Corrector

    And yes, it works on regular polish and gel. OPI said no smudges, no stress.

    Why We Love It

    All of the benefits you want for any type of nail packed into in one small but mighty package. This primo nail polish corrector pen gets it done.

    OPI Nail Polish Corrector
    OPI Nail Polish Corrector
    • 🖊️ Precision tip = clean lines, no over-wiping
    • 💅 Fixes polish mistakes in literal seconds
    • 🔁 Comes with extra replacement tips (you get 2!)
    • 🔥 Filled with OPI-quality remover so it works fast but won’t trash your nails
    • 👜 Travel-size—throw it in your bag, your car, your desk drawer, wherever

    Whether you’re doing full-on nail art or just trying to clean up that one stubborn pinky, this pen is like having a tiny nail tech in your pocket.

    When To Use It

    Anytime, anywhere. Keep this with you at home or on the go. In fact, we recommend you scoop up more than one for safety.

    OPI Nail Polish Corrector
    OPI Nail Polish Corrector
    • After your mani for that crisp, clean “did you get those done?” look
    • Mid-mani when your non-dominant hand betrays you 😬
    • For detailed nail art clean-up (especially around cuticles)
    • On the go—because we all paint our nails in the car at least once, right?

    It’s one of those products you don’t think you need… until you use it once and never look back.

    OPI vs. The Rest: Why This One Wins 🏆

    Sure, there are other corrector pens out there—but most are either dried out, too harsh, or have tips that fray after one use. OPI understood the assignment. You’re getting:

    OPI Nail Polish Corrector
    OPI Nail Polish Corrector
    • Salon-grade remover
    • Quality felt tips that actually hold up
    • No acetone stink or over-drying
    • Backed by a brand we all trust (we’ve all got at least one OPI polish in our stash, don’t lie)

    It’s the little luxury that makes your whole nail routine feel ✨elevated✨.

    Final Conclusion: Toss the Q-tips, Grab This Pen

    If you’re tired of redoing nails because of tiny mistakes—or if you just want your manicures to look extra sharp—this pen is your holy grail. It’s compact, clean, and honestly kind of addicting to use. Like a mini highlight reel for your nails.

    The OPI Nail Polish Remover + Corrector Pen is the kind of product that makes your life easier and your nails cuter. And we love that.

  • I’m Shook! My New Favorite DIY Nail Art Dotting and Brush Set Makes Perfect Gel Nails in Minutes: Top Ranked Review

    I’m Shook! My New Favorite DIY Nail Art Dotting and Brush Set Makes Perfect Gel Nails in Minutes: Top Ranked Review

    🔥 Trending now – share this post

    The Artdone 6-Piece Nail Art Brush & Dotting Pen Set Is Your New DIY Ride-or-Die 💅✨

    Let’s cut to the chase: if you’re even remotely into doing your own nails, you need this in your life. Thi Artdone 6-Piece Nail Art Pen Set is basically your shortcut to looking like you dropped a load of money at a salon—except you’re doing it at home, for free, in your comfiest sweatpants, probably watching a rewatch of reality tv.

    Artdone Nail Art Dotting Pens and Brushes Dual Sided
    Artdone Nail Art Dotting Pens and Brushes Dual Sided

    This is one of those rare finds that’s actually worth the hype. It’s simple, affordable, and crazy versatile. Whether you’re a nail art newbie or already that friend who brings their own tools to mani night—this one’s for you.

    What You Get

    6 Double-Ended Nail Art Pens = 12 Tools Total 🎨

    Let’s break it down because this set really understood the assignment.

    Artdone Nail Art Dotting Pens and Brushes Dual Sided
    Artdone Nail Art Dotting Pens and Brushes Dual Sided

    On One Side: Brushes (4 brush pens + 2 liner pens)

    • 4 bristled brushes → These are your go-to for painting, filling in color, blending, swirling, or getting that cute marbled look
    • 2 liner pens → Perfect for precise lines, tiny patterns, and trendy minimalist vibes (hello, micro-French tips 👀)

    These brushes are made with nylon hair, which means they’re soft but snappy, and they work beautifully with regular polish or acrylic paint. No fraying, no streaks, no mess.

    On the Other Side: Dotting Tools (All 6 are double-ended)

    You’re getting 5 metal ball sizes (1.0 / 1.5 / 2.0 / 2.5 / 3.0 mm), which are perfect for:

    • Tiny dots and accents
    • Cute flowers and petals
    • Marbling, drag effects, or layered looks
    • That “gel droplet” vibe that’s all over Pinterest right now

    The rounded metal tips are stainless steel—so they’re durable, smooth to use, and won’t scratch up your nail beds or tear your paper if you’re using them for crafts, too.

    Features That Just Make Sense

    Everything you want in a dotting and brush set and nothing you don’t.

    Artdone Nail Art Dotting Pens and Brushes Dual Sided
    Artdone Nail Art Dotting Pens and Brushes Dual Sided

    💅 Super easy grip handles so your hand isn’t cramping mid-ma

    🎨 Great for detail work: thin lines, short strokes, intricate flowers, abstract designs—you name it

    🎨 Perfect for multiple mediums: nail polish, acrylic paint, builder gel, etc.

    🧼 Easy to clean, easy to store, and super beginner-friendly

    ✨ Doubles as a tool for model painting, rock painting, even face painting (we love a multitasker)

    What Customers Are Saying (AKA the Receipts 🧾)

    The vibes? Affordable and high quality. People are shocked at how much value this little set packs.

    Inspiration for your Creation

    Your imagination is your limitation with this 6 piece brush set. You can create almost any nail art design easily with no practice.

    Artdone Nail Art Dotting Pens and Brushes Dual Sided
    Artdone Nail Art Dotting Pens and Brushes Dual Sided

    🌼 Dainty daisies and smiley faces

    🖤 Abstract swirl nails and groovy 70s patterns

    ✨ Marbled, blended, ombré designs

    💧 Chrome aura nails with a 3D droplet effect

    🔮 Stereoscopic, multi-layered patterns that look way harder than they actually are

    Even if your hand is shaky or you’ve never painted anything besides your walls—these tools make it so much easier to get those tiny details just right.

    Why Artdone Slays (And Why Other Kits Don’t Measure Up)

    Here’s the tea: a lot of other brush sets are overloaded with filler tools, confusing shapes, and poor quality. This top rated Artdone nail art set keeps it easy and simple. You’re getting:

    • Just the tools you’ll actually use
    • Solid build quality (the metal and nylon hold up over time)
    • A beginner-friendly layout without sacrificing pro-level results

    It’s giving nail art studio in a pencil case, and we’re here for it.

    Final Verdict: Add to Cart and Buy, You’ll Thank Yourself

    For under the price of one salon add-on, you’re getting a full nail tool kit that works for every trend, every polish type, and every level of skill. It’s cute, compact, multi-purpose—and low-key addicting once you start playing with it.

    Artdone Nail Art Dotting Pens and Brushes Dual Sided
    Artdone Nail Art Dotting Pens and Brushes Dual Sided

    So yes, the Artdone 6-Piece Nail Art Brush & Dotting Pen Set is 100% worth it. Whether you’re prepping for a hot date, a night out, or just vibing with your favorite Spotify playlist, this kit is the glow-up you didn’t know you needed.

    Your nails are ready for their close-up. 💖

  • OMG! I Dry My Nails 50% Faster than at the Salon with this Insane Must-Have Nail Drying Lamp: Top Ranked Review

    OMG! I Dry My Nails 50% Faster than at the Salon with this Insane Must-Have Nail Drying Lamp: Top Ranked Review

    🔥 Trending now – share this post

    Why We’re Obsessed with This UV Nail Lamp (And You Will Be Too)
    Spoiler: It’s the only one I trust for my at-home manis 💅

    Okay so let’s talk gel nails. If you’re like me—a little addicted to that glossy, chip-free look but also not trying to spend hundreds a month at the salon—then you already know how game-changing at-home gel kits are. But here’s the thing no one really tells you: your gel polish is only as good as your curing lamp.

    The SUNUV LED Nail Lamp is your biggest nail upgrade this year and what you’ve needed all along

    SUNUV LED Nail Drying Lamp
    SUNUV LED Nail Drying Lamp

    👉 SUNUV UV LED Nail Lamp

    Here’s why I’m fully in love with it—and why I’m confidently naming it my #1 recommendation over the top contenders. Let’s get into it.

    🌟 Why You Need this UV Nail Lamp in Your Life

    If you’re using gel polish without a proper UV/LED curing lamp, girl, I hate to break it to you… but your mani is not gonna last. Like, at all.

    SUNUV LED Nail Drying Lamp
    SUNUV LED Nail Drying Lamp

    UV lamps are essential because:

    • They fully cure (aka harden) your gel polish
    • Lock in that chip-free, glassy shine
    • Cut your drying time down to literal seconds

    No more smudged nails from being impatient (guilty 🙋‍♀️).

    💡 Why This One is the Best (Trust Me)

    I went through a few terrible lamps before I found this one. The SUNUV UV LED Nail Lamp is:

    SUNUV LED Nail Drying Lamp
    SUNUV LED Nail Drying Lamp
    • Fast AF (cures in 30-60 seconds, not even kidding)
    • Has smart sensors that turn on/off when you move your hand (hello, convenience)
    SUNUV LED Nail Drying Lamp
    SUNUV LED Nail Drying Lamp
    • Comes with 3 timer settings (5s, 30s, 60s, and bonus 99s low heat mode for sensitive hands)
    • Compact but fits my whole hand without awkward repositioning
    • Works on every gel polish I own (and I’ve got a little collection 😅)

    It also looks super sleek on my vanity, so bonus points for the aesthetic.

    🛍️ But What About the Competition?

    Great question, and yes—I did my homework (so you don’t have to). Here’s how it stacks up:

    Our Pick: SUNUV UV LED LAMP

    SUNUV LED Nail Drying Lamp
    SUNUV LED Nail Drying Lamp

    ✨ Sensor: Infrared auto-sensor Smart sensor Smart sensor Auto sensor

    💅 Compatibility: All gel polishes All gel polishes All gel polishes All gel polishes

    SUNUV LED Nail Drying Lamp
    SUNUV LED Nail Drying Lamp

    🌈 Extras: Compact, travel-friendly, removable base Bigger but bulkier Salon-style, pricier Budget-friendly but slower

    SUNUV LED Nail Drying Lamp
    SUNUV LED Nail Drying Lamp

    Other competitors simply don’t stack up to the SUNUV LED Nail Lamp. For the value you get and savings from DIY instead of expensive nail salon trips, this is your must-have buy this year!

    ✨ The Bottom Line


    There are a lot of UV lamps out there, but the SUNUV LED Nail Lamp is the one that’s stayed in my routine. It’s super reliable, fast, and honestly a steal for the quality you get. Whether you’re a DIY nail newbie or you’ve been doing your own gels for years, this is the kind of tool that’ll make you look like you went to a salon—without leaving your couch.

    It’s time to treat yourself and level up your mani game and this lamp is it. 💅